|
Size: 909
Comment:
|
Size: 2463
Comment:
|
| Deletions are marked like this. | Additions are marked like this. |
| Line 11: | Line 11: |
| Start by installing syncthing {{{ apt-get install syncthing }}} |
|
| Line 19: | Line 25: |
For each user that is going to synchronize against this system, create a directory for them in `/srv/home` and give it the correct ownership. {{{ mkdir /srv/home/kale chown -R kale:kale /srv/home/kale }}} For each user add the syncthing service to default runlevel and start it. {{{ systemctl enable syncthing@kale.service systemctl start syncthing@kale.service }}} When the syncthing service starts, it creates a set of config files in the users home directory. Edit `/home/kale/.config/syncthing/config.xml` and look for the section below. Change the address, so the service listens on all interfaces `<address>0.0.0.0:8384</address>`, instead of just localhost. Notice that when you make this change, your syncthing service is public. Everyone can change it. {{{#!highlight xml <gui enabled="true" tls="true" debugging="false"> <address>127.0.0.1:8384</address> <user>kale</user> <password>password hash</password> <apikey>apikey</apikey> <theme>default</theme> </gui> }}} Restart the service for the specific user. {{{ systemctl restart syncthing@kale.service }}} == GUI == It should now be possible to connect to the syncthing GUI on https://syncthing:8384 and configure it. === Credentials === Start by setting up a username, a password and force https. This is done in the settings dialog in the GUI tab. Your installation should now be secured. {{attachment:syncthing-settings-gui.png||align="top"}} |
Syncthing
Syncthing is a modern file synchronization tool. It synchronizes files between various devices and operating systems. It is a great tool for automatic backup of personal files and smartphones. It has several usefull features:
- Easy easy and simple configuration
- File versioning
For this setup we will use GlusterFS as the file store backend.
Software
Start by installing syncthing
apt-get install syncthing
Filesystem
Configure your system as a GlusterFS client, so you have the following in your fstab.
/etc/glusterfs/home.vol /srv/home glusterfs defaults,_netdev,rw 0 0
Configuration
For each user that is going to synchronize against this system, create a directory for them in /srv/home and give it the correct ownership.
mkdir /srv/home/kale
chown -R kale:kale /srv/home/kale
For each user add the syncthing service to default runlevel and start it.
systemctl enable syncthing@kale.service
systemctl start syncthing@kale.service
When the syncthing service starts, it creates a set of config files in the users home directory. Edit /home/kale/.config/syncthing/config.xml and look for the section below. Change the address, so the service listens on all interfaces <address>0.0.0.0:8384</address>, instead of just localhost. Notice that when you make this change, your syncthing service is public. Everyone can change it.
Restart the service for the specific user.
systemctl restart syncthing@kale.service
GUI
It should now be possible to connect to the syncthing GUI on https://syncthing:8384 and configure it.
Credentials
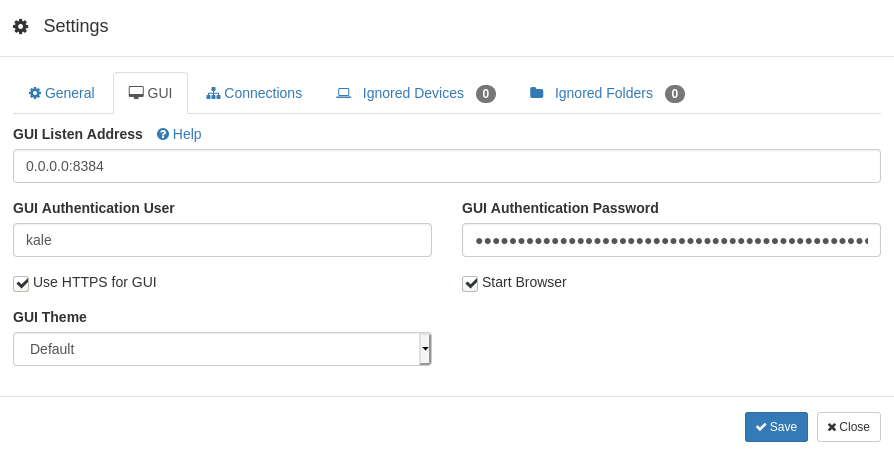
Start by setting up a username, a password and force https. This is done in the settings dialog in the GUI tab. Your installation should now be secured.

Instances
Kalle https://syncthing:8384/
Sanne https://syncthing:8385/
Family https://syncthing:8386/
Viktor https://syncthing:8387/
- Karla
References
* https://theselfhostingblog.com/posts/how-to-set-up-a-headless-syncthing-network/